How to Install Peel and Stick Wallpaper
How to install peel and stick wallpaper starts with clean, smooth, and dry walls. Measure carefully, align the first panel accurately, then peel away the backing gradually while smoothing out air bubbles as you work. Taking your time with preparation and alignment helps achieve a professional-looking finish that lasts.
What You'll Need
Before you begin, gather the following:
- Peel and stick wallpaper
- Tape measure
- Spirit level or laser level
- Pencil
- Craft knife with fresh blades
- Metal ruler or straight edge
- Wallpaper smoothing tool or plastic scraper
- Soft microfibre cloth
- Step ladder (if required)
- Cleaning cloth and mild detergent
Step-by-Step Guide
Step 1: Prepare the Wall
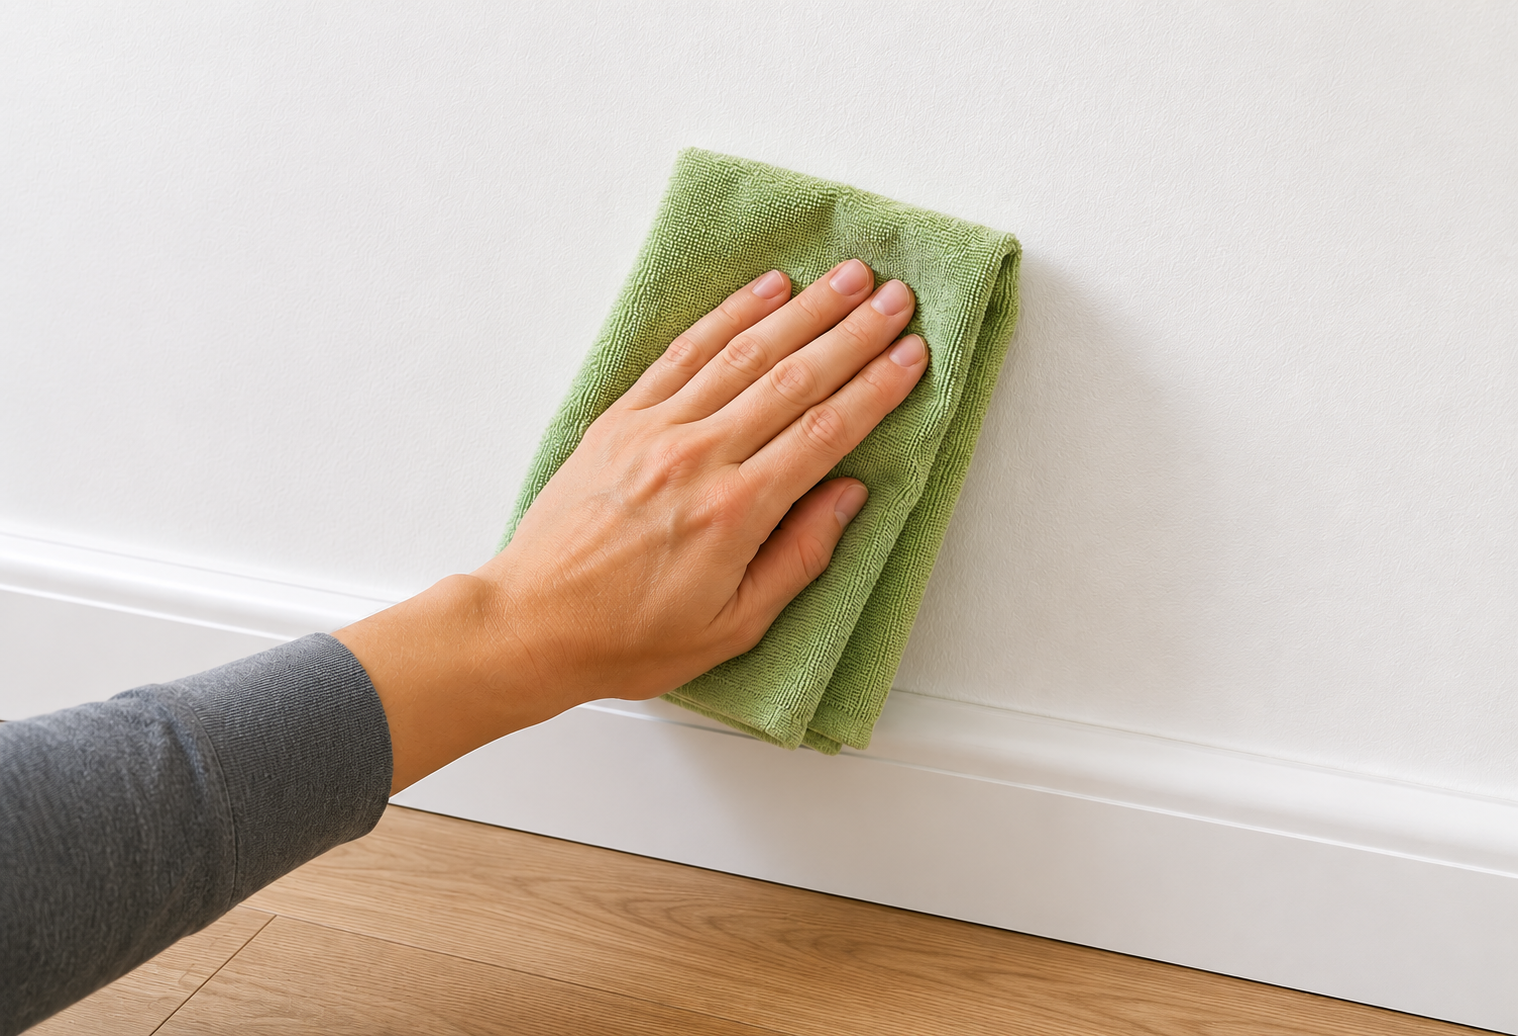
Proper preparation is one of the most important steps when learning how to install peel and stick wallpaper.
Make sure the wall is:
- Clean and free from dust, grease and dirt
- Completely dry
- Smooth with no loose paint or flaking plaster
- Fully cured if recently painted, usually at least 2 to 4 weeks depending on the paint manufacturer
If the wall previously had wallpaper, complete any wallpaper removal before installation. Take time removing old wallpaper, scrape away leftover wallpaper adhesive, repair damaged areas and lightly sand rough patches. Properly prepare walls for new wallpaper to improve adhesion and create a smoother finish.
Step 2: Measure and Plan
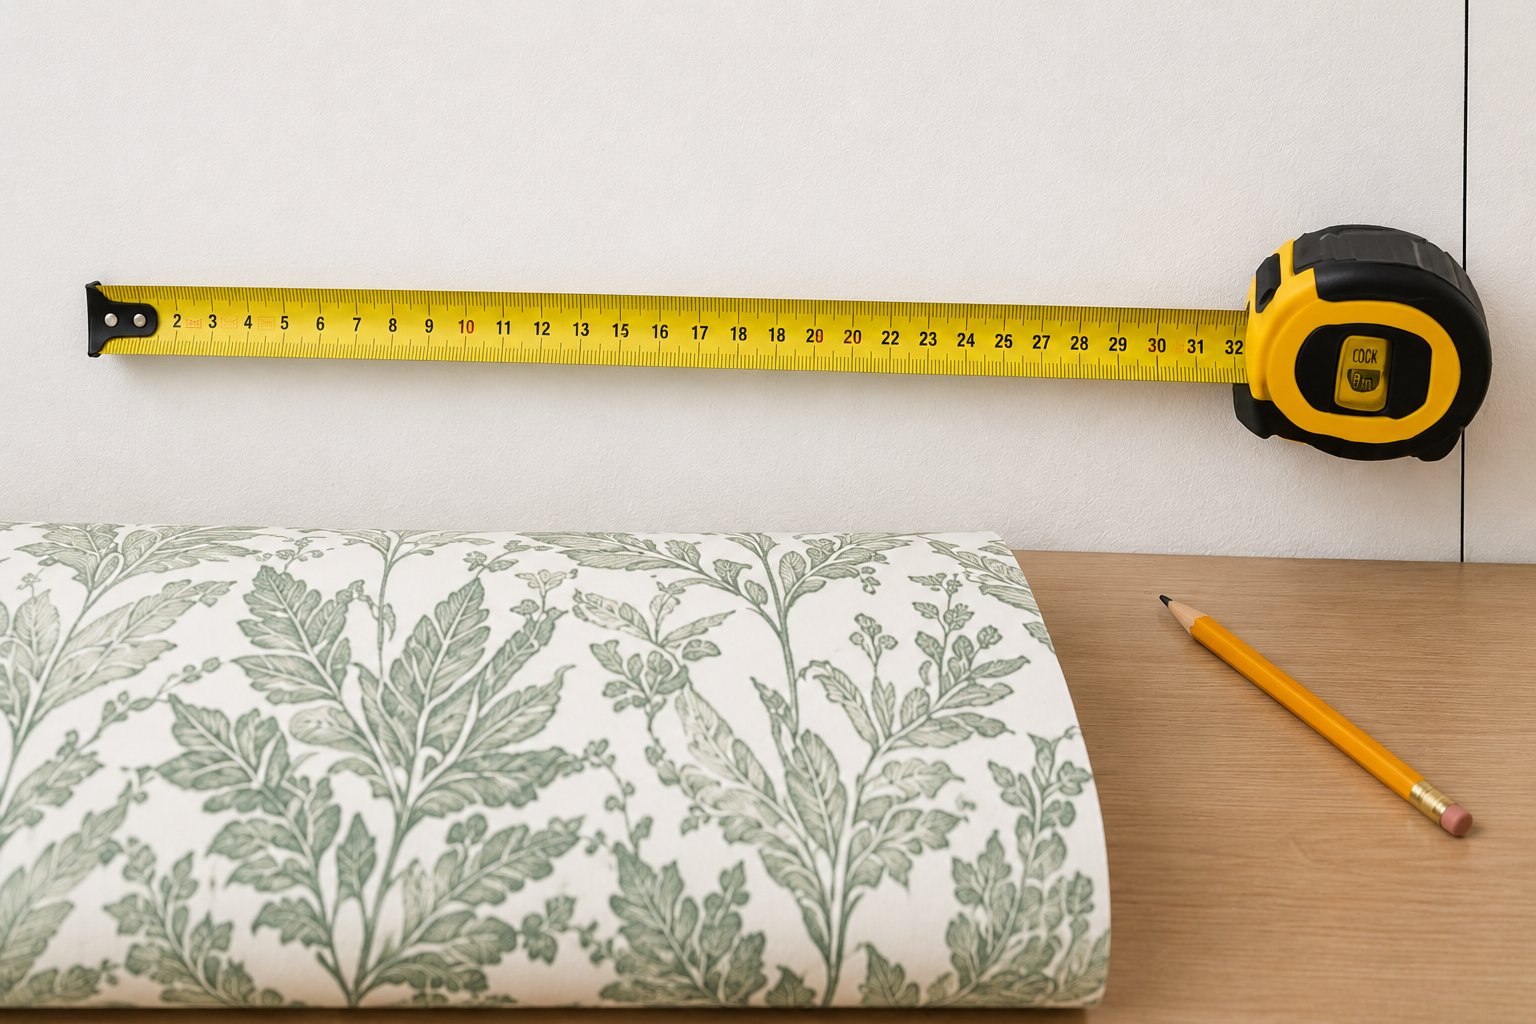
Measure the wall height and width before cutting each panel.
Leave a small trimming allowance of around 5 cm at both the top and bottom.
Plan where each panel will start. Beginning near the least noticeable corner often helps minimise visible joins.
Step 3: Mark a Straight Starting Line
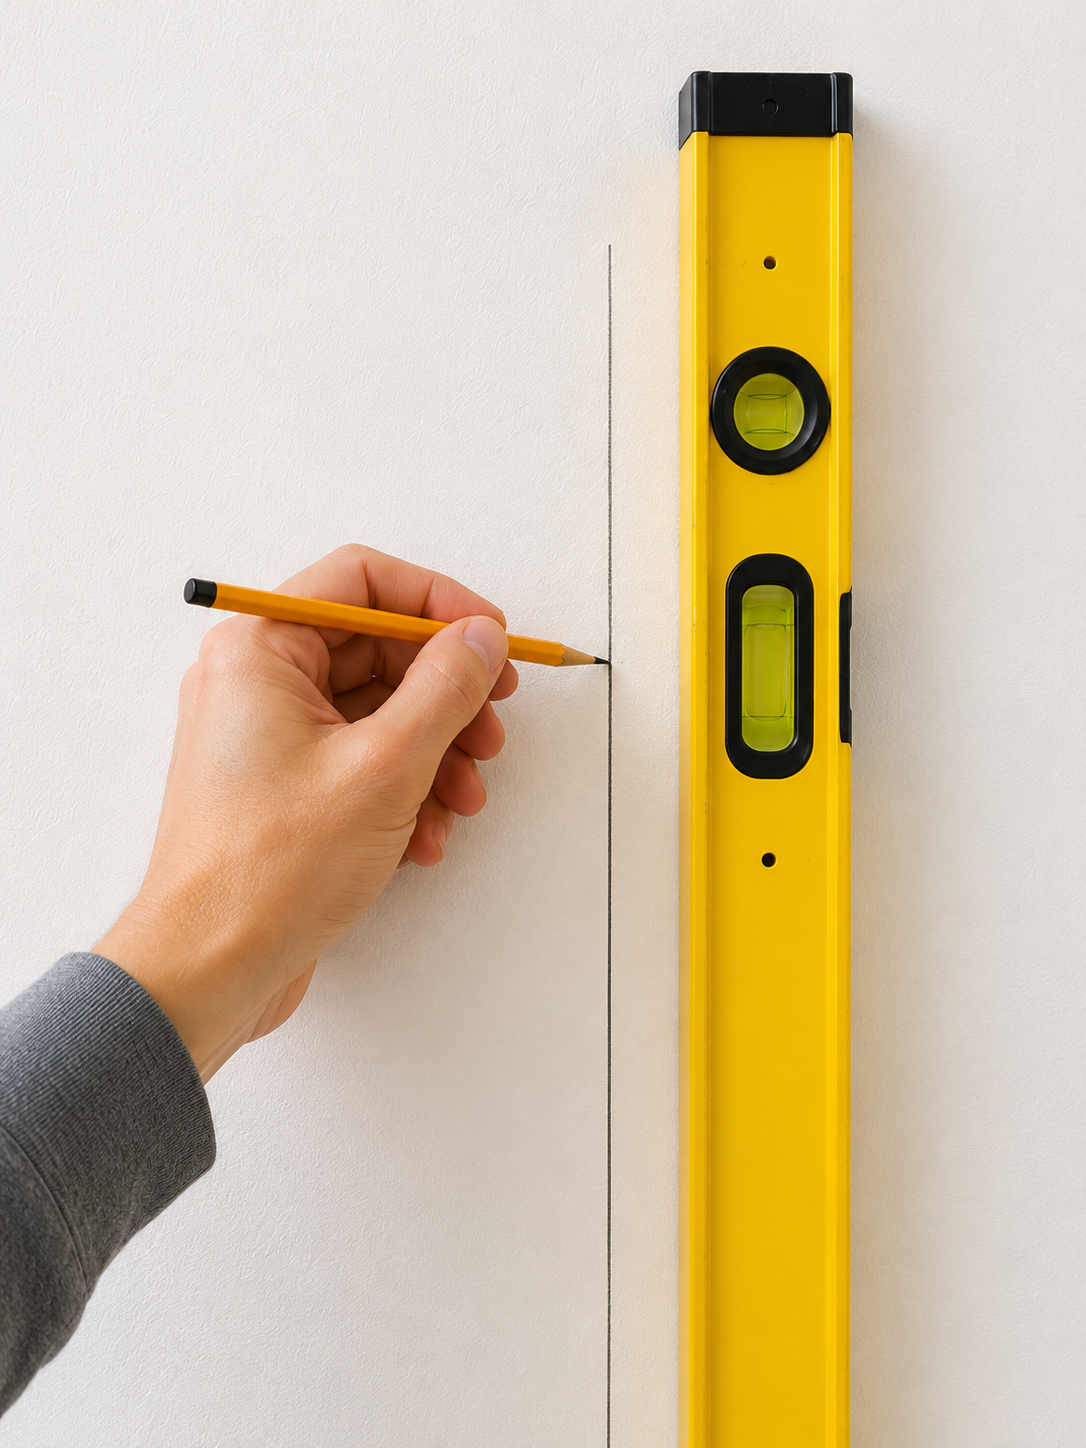
Even if your corner appears straight, it may not be perfectly vertical.
Use a spirit level or laser level to draw a vertical guide line. This first line helps keep every panel aligned across the wall.
Step 4: Peel the Backing Gradually
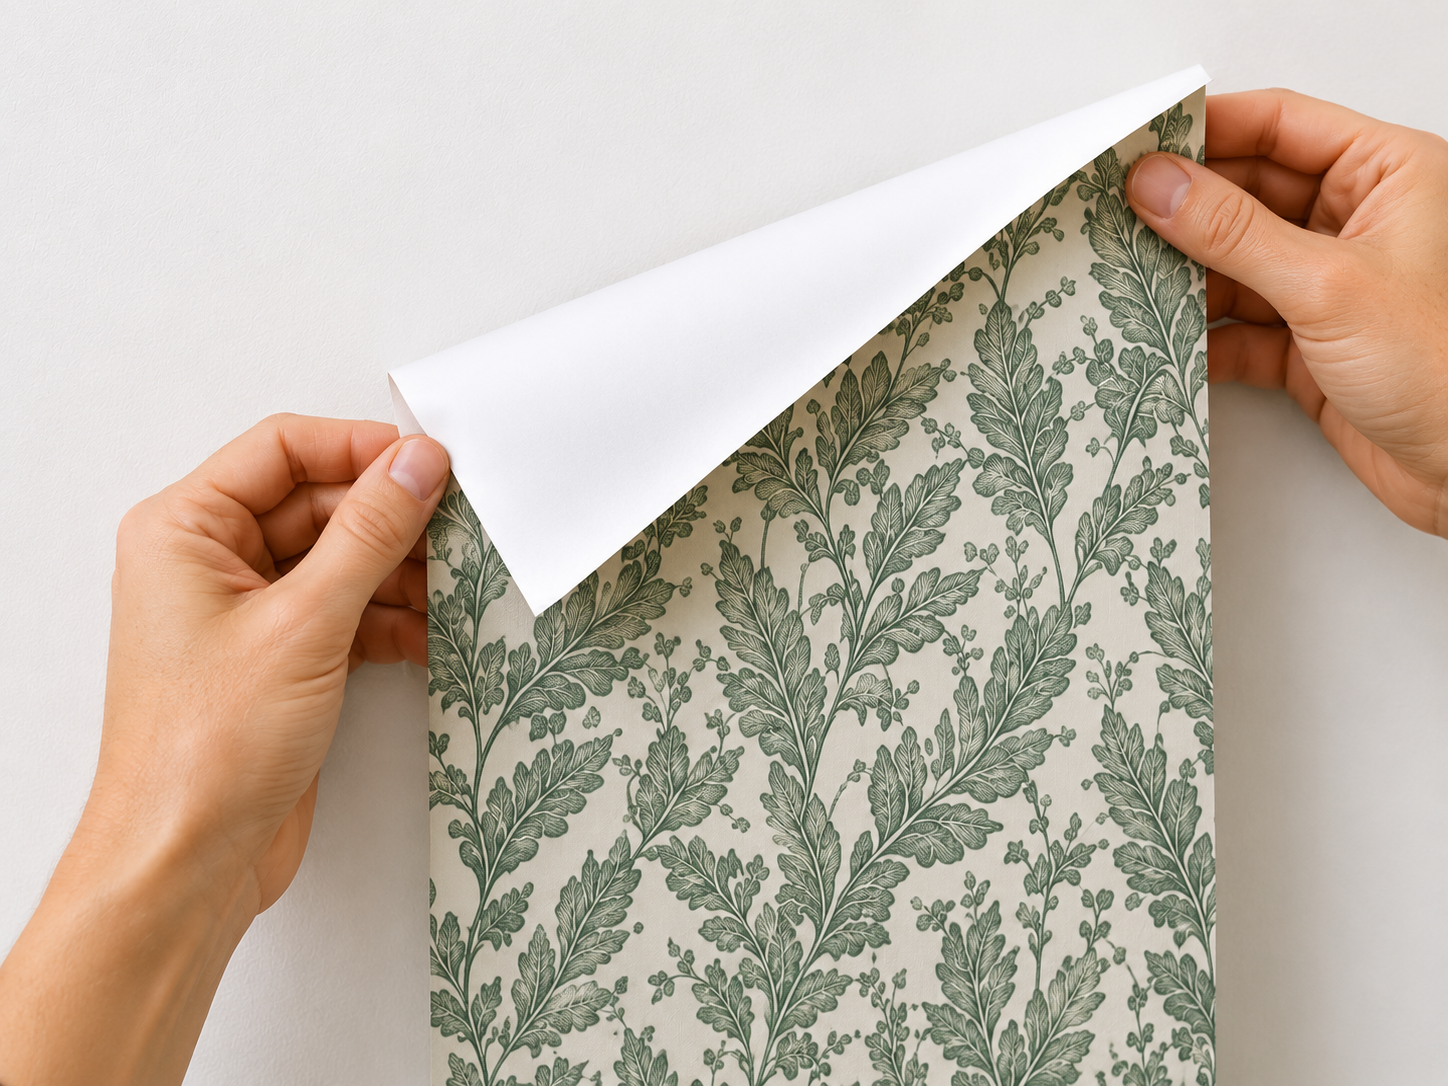
Peel back only 20 to 30 cm of the backing paper initially.
Avoid removing the entire backing at once, as this makes the wallpaper harder to control and increases the chance of wrinkles or accidental sticking.
Step 5: Position the First Panel
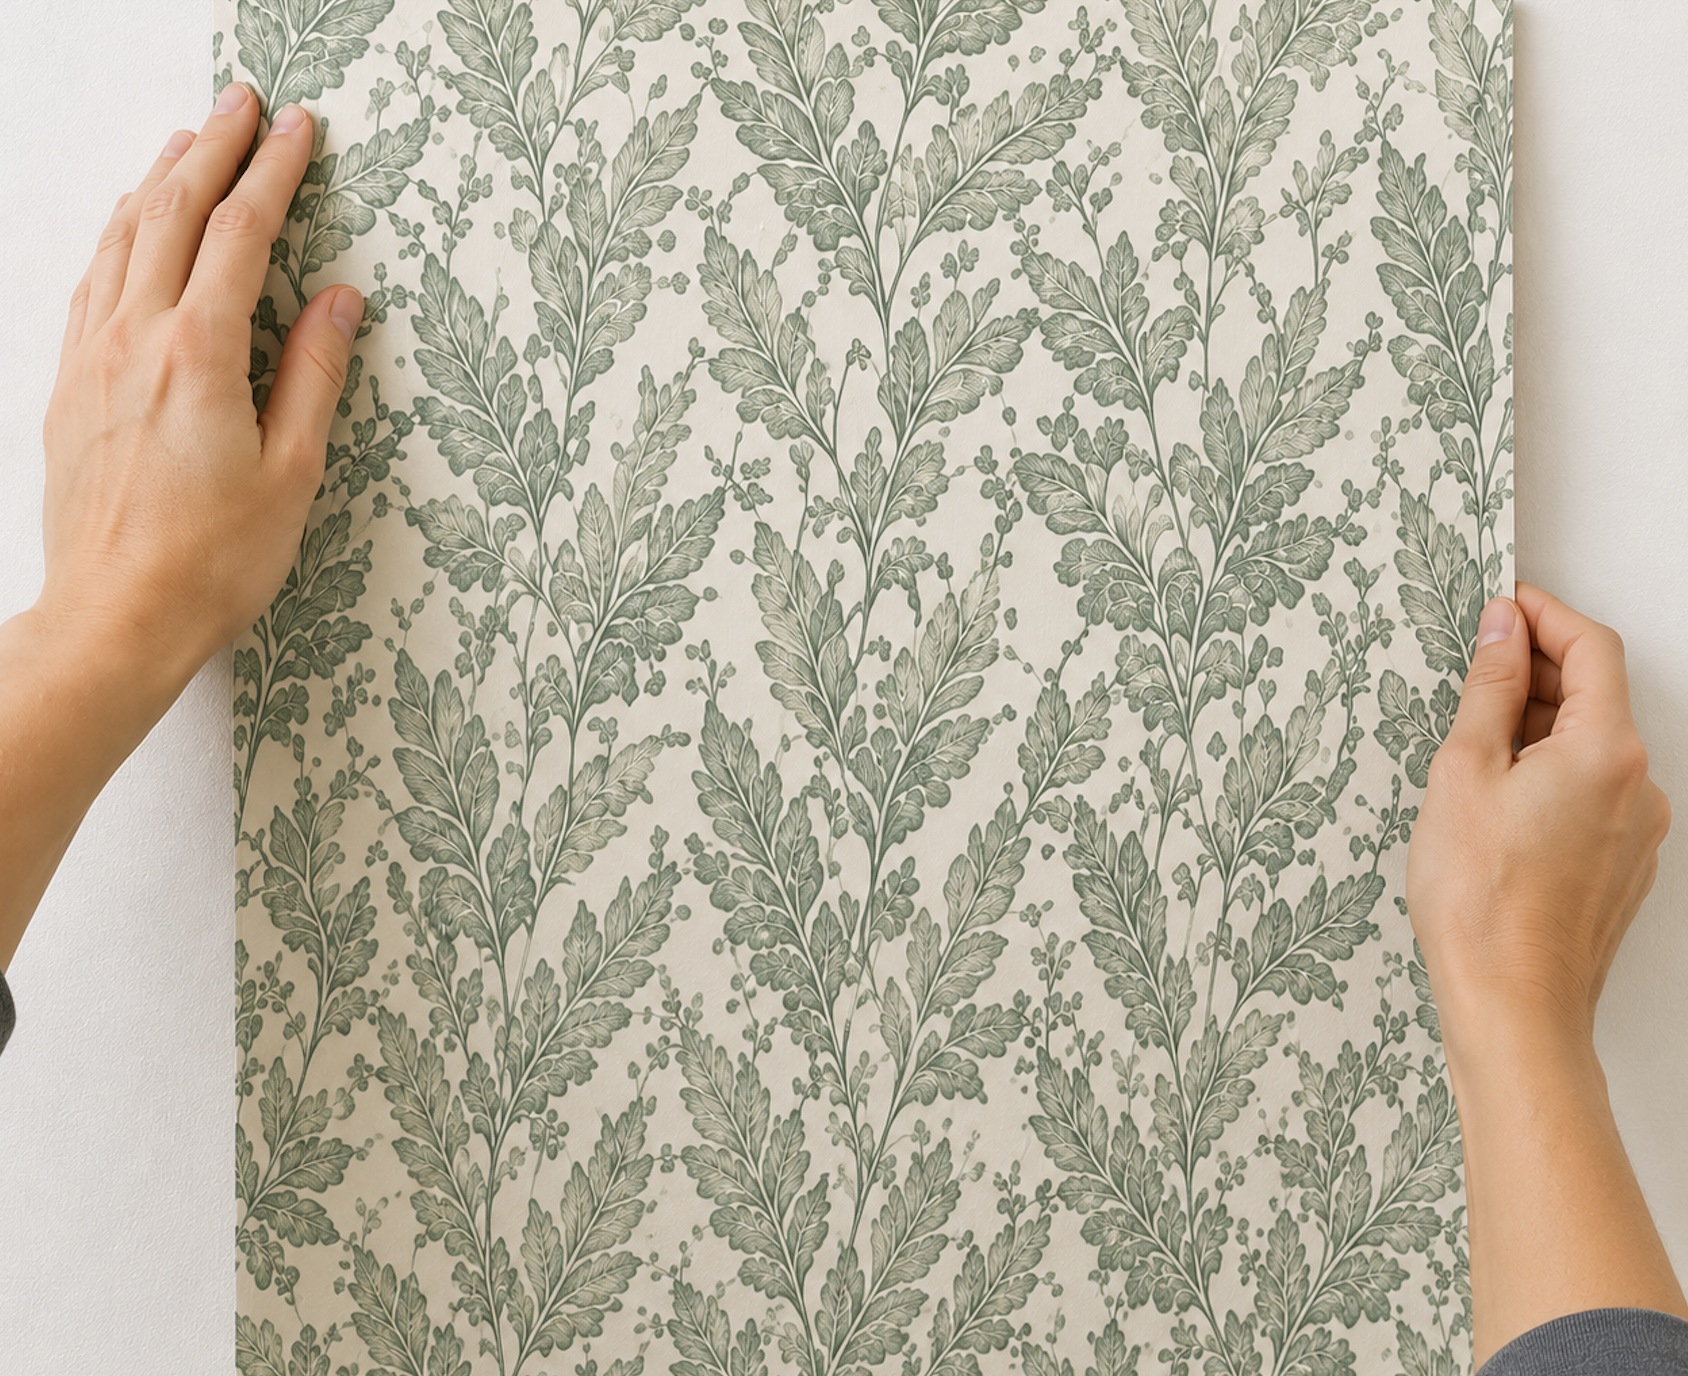
Align the wallpaper with your guide line before pressing it firmly onto the wall.
Take extra care with the first panel because every following strip will rely on its position.
If necessary, gently peel it back and reposition before applying full pressure.
Step 6: Smooth as You Go
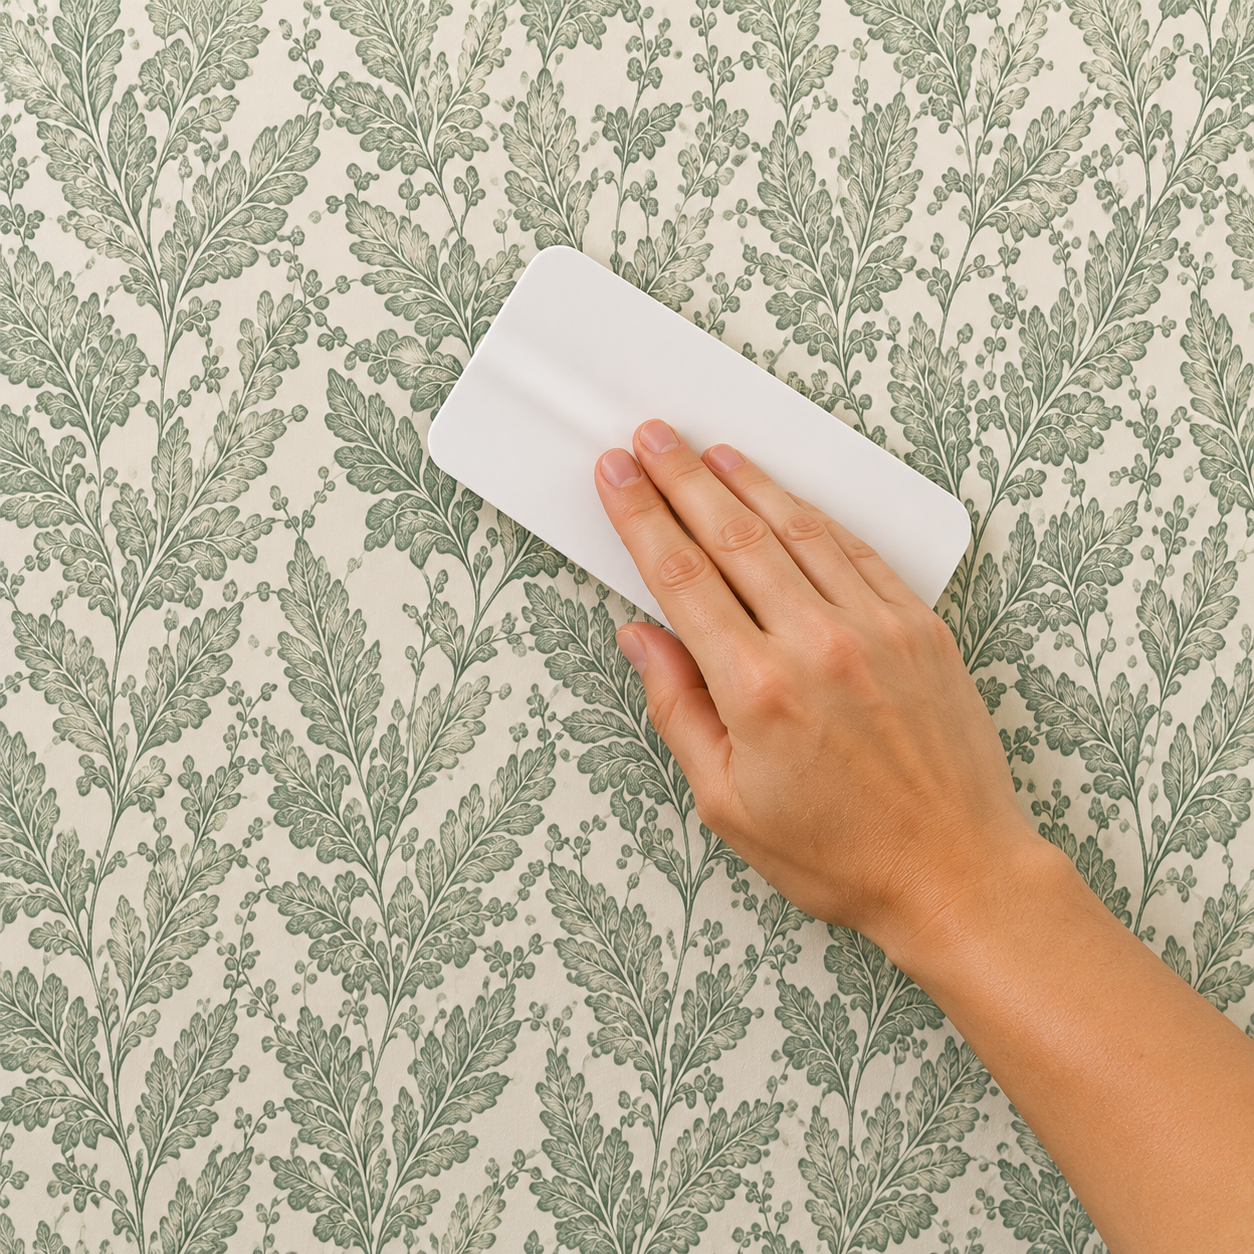
Work from the centre outwards using a wallpaper smoothing tool.
Continue peeling the backing a little at a time while smoothing downward.
This helps remove trapped air and reduces wrinkles.
Step 7: Match the Pattern
If your wallpaper has a repeating design, align the pattern before fixing the next panel.
Take your time here, as rushing can make joins more noticeable.
Step 8: Trim the Edges
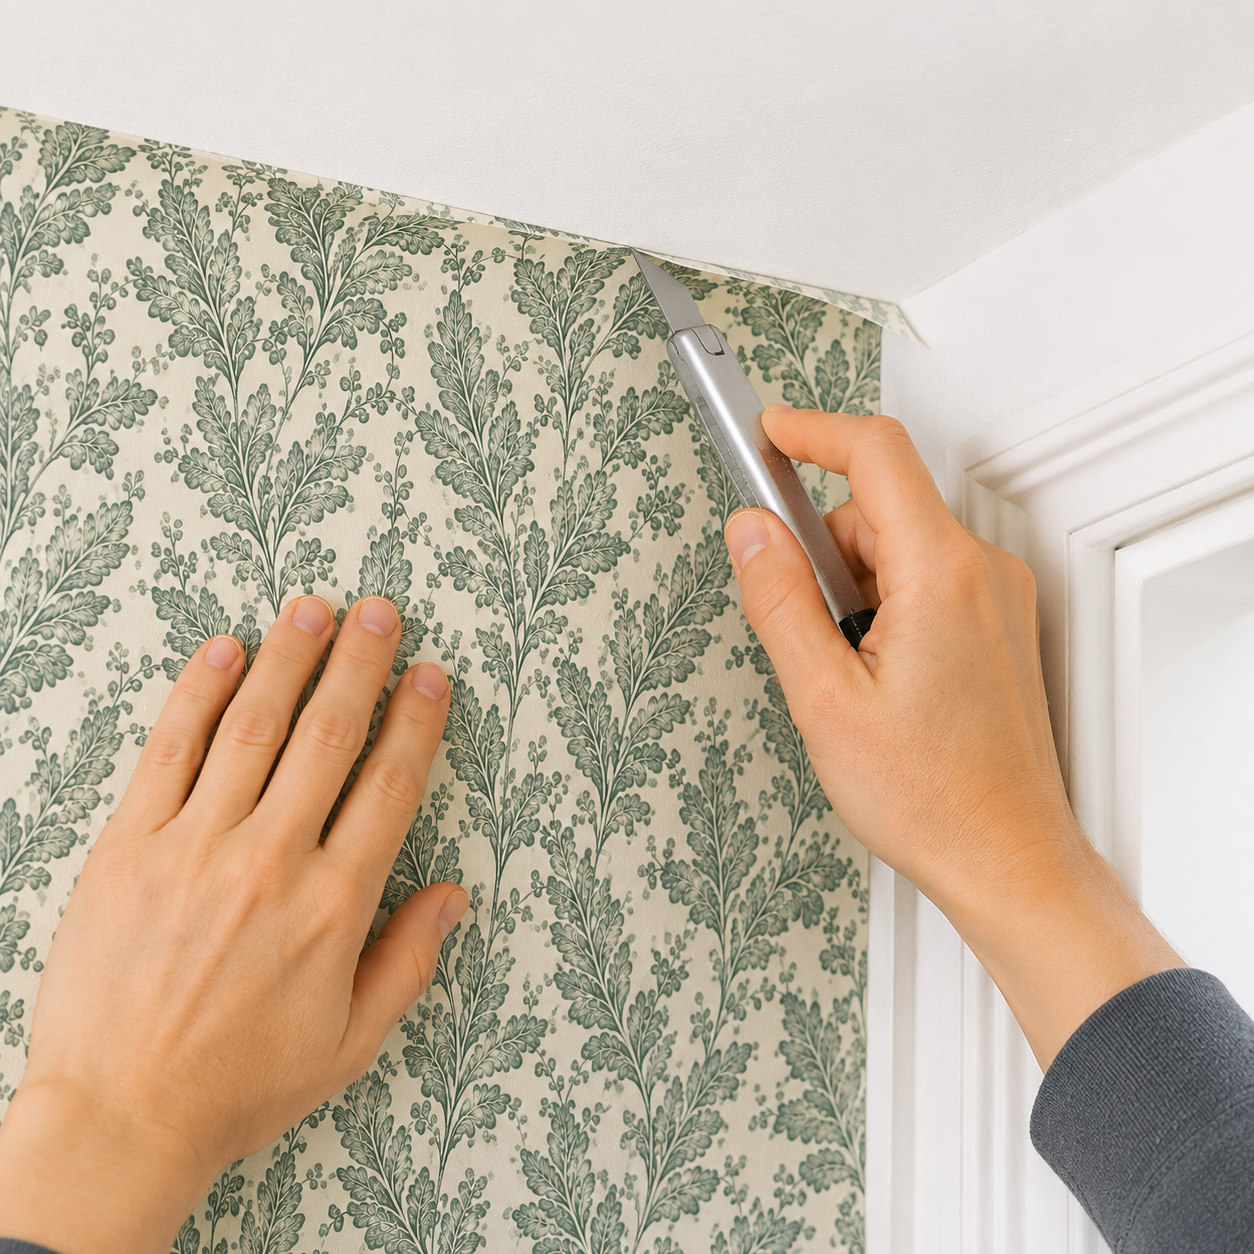
Once each panel is secure, trim the excess wallpaper along ceilings, skirting boards and corners using a sharp craft knife and metal ruler.
Replace dull blades regularly to achieve clean cuts.
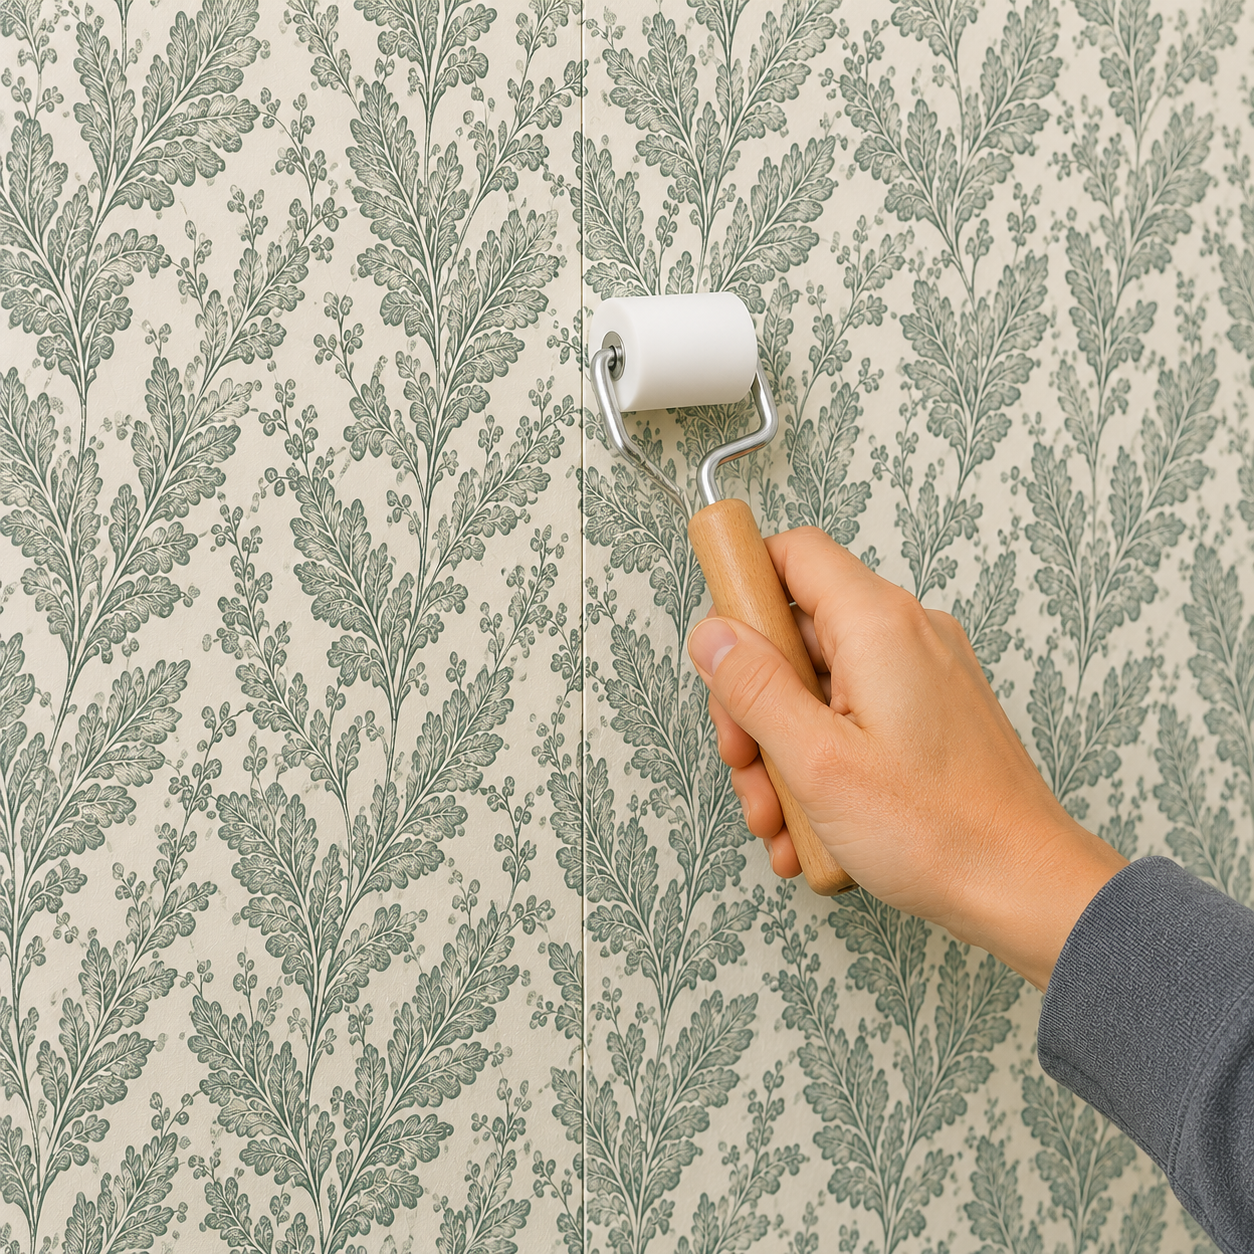
Step 9: Finish the Installation
Run the smoothing tool over all seams and edges once more.
Check for any remaining bubbles. Small air pockets can often be worked towards the nearest edge with gentle pressure.
Common Mistakes to Avoid
Many installation problems come from rushing the preparation rather than the wallpaper itself.
Avoid these common mistakes:
- Applying wallpaper to dusty or greasy walls
- Installing onto fresh paint before it has fully cured
- Skipping the vertical guide line
- Removing the entire backing paper before positioning
- Stretching the wallpaper during installation
- Using a blunt knife for trimming
- Ignoring leftover wallpaper adhesive after how to strip wallpaper or previous wallpaper removal
When to Call a Professional
Peel and stick wallpaper is suitable for many DIY projects, but professional installation may be worthwhile if:
- Your walls are heavily textured or uneven.
- Large wall repairs are needed before installation.
- You are installing wallpaper on staircases or high ceilings.
- The room has multiple awkward corners, alcoves or architectural details.
Professional preparation can often produce a cleaner finish on challenging surfaces.
FAQ
Can peel and stick wallpaper be installed over existing wallpaper?
It is not recommended. Existing wallpaper may loosen over time, affecting adhesion. For the best results, complete proper wallpaper removal before installing new wallpaper.
Do I need wallpaper adhesive?
No. Peel and stick wallpaper already has adhesive applied to the back, so no additional wallpaper adhesive is required.
What if my walls previously had wallpaper?
Complete removing old wallpaper, remove any adhesive residue, repair imperfections and thoroughly prepare walls for new wallpaper before installation.
Can peel and stick wallpaper be repositioned?
Most quality peel and stick wallpapers can be gently lifted and repositioned during installation. However, repeated repositioning may reduce adhesion, so aim to place each panel correctly as early as possible.
Can peel and stick wallpaper damage paint?
On properly prepared and fully cured painted walls, high-quality peel and stick wallpaper is generally designed to remove cleanly. Results may vary depending on the paint type and wall condition.
Conclusion
Learning how to install peel and stick wallpaper is straightforward when you prepare carefully and work methodically. Clean, smooth walls, accurate measurements and careful alignment all contribute to a professional-looking finish. Whether you are updating a feature wall or decorating an entire room, proper wall preparation helps wallpaper sit smoothly and last longer, particularly when installing premium or made-to-measure wallpaper.


