How to Wallpaper Around Wall Sockets and Switches
Wallpapering around wall sockets and switches is straightforward if you hang the wallpaper first, make small relief cuts, and trim carefully around the faceplate. For safety, always switch off the electrical power before loosening any socket or switch covers.
What You'll Need
Before you begin, gather the following tools and materials:
- Wallpaper
- Wallpaper adhesive (if required)
- Wallpaper brush or smoothing tool
- Sharp snap-off knife or wallpaper trimming knife
- Screwdriver
- Metal straight edge (optional)
- Spirit level or plumb line
- Clean damp sponge
- Voltage tester (recommended)
Step-by-Step Guide
1. Turn Off the Power
Before working around any electrical fitting, switch off the power at your consumer unit (fuse box).
Use a voltage tester to confirm that the socket or switch is no longer live before removing the faceplate.
This is an essential safety step and should never be skipped.
2. Loosen the Faceplate
Using a screwdriver, carefully loosen the screws holding the socket or switch cover.
You do not usually need to disconnect any wiring. Simply pull the faceplate forward a few millimetres to create enough space for the wallpaper to slide neatly behind it.
Keep the screws somewhere safe until you are ready to refit the cover.
3. Hang the Wallpaper Normally
Position the wallpaper strip as you would on any flat section of wall.
Smooth it into place using a wallpaper brush or smoothing tool, allowing the wallpaper to cover the socket or switch completely.
Do not cut the wallpaper before hanging it, as this makes accurate trimming much more difficult.
4. Make a Small Cross-Shaped Cut
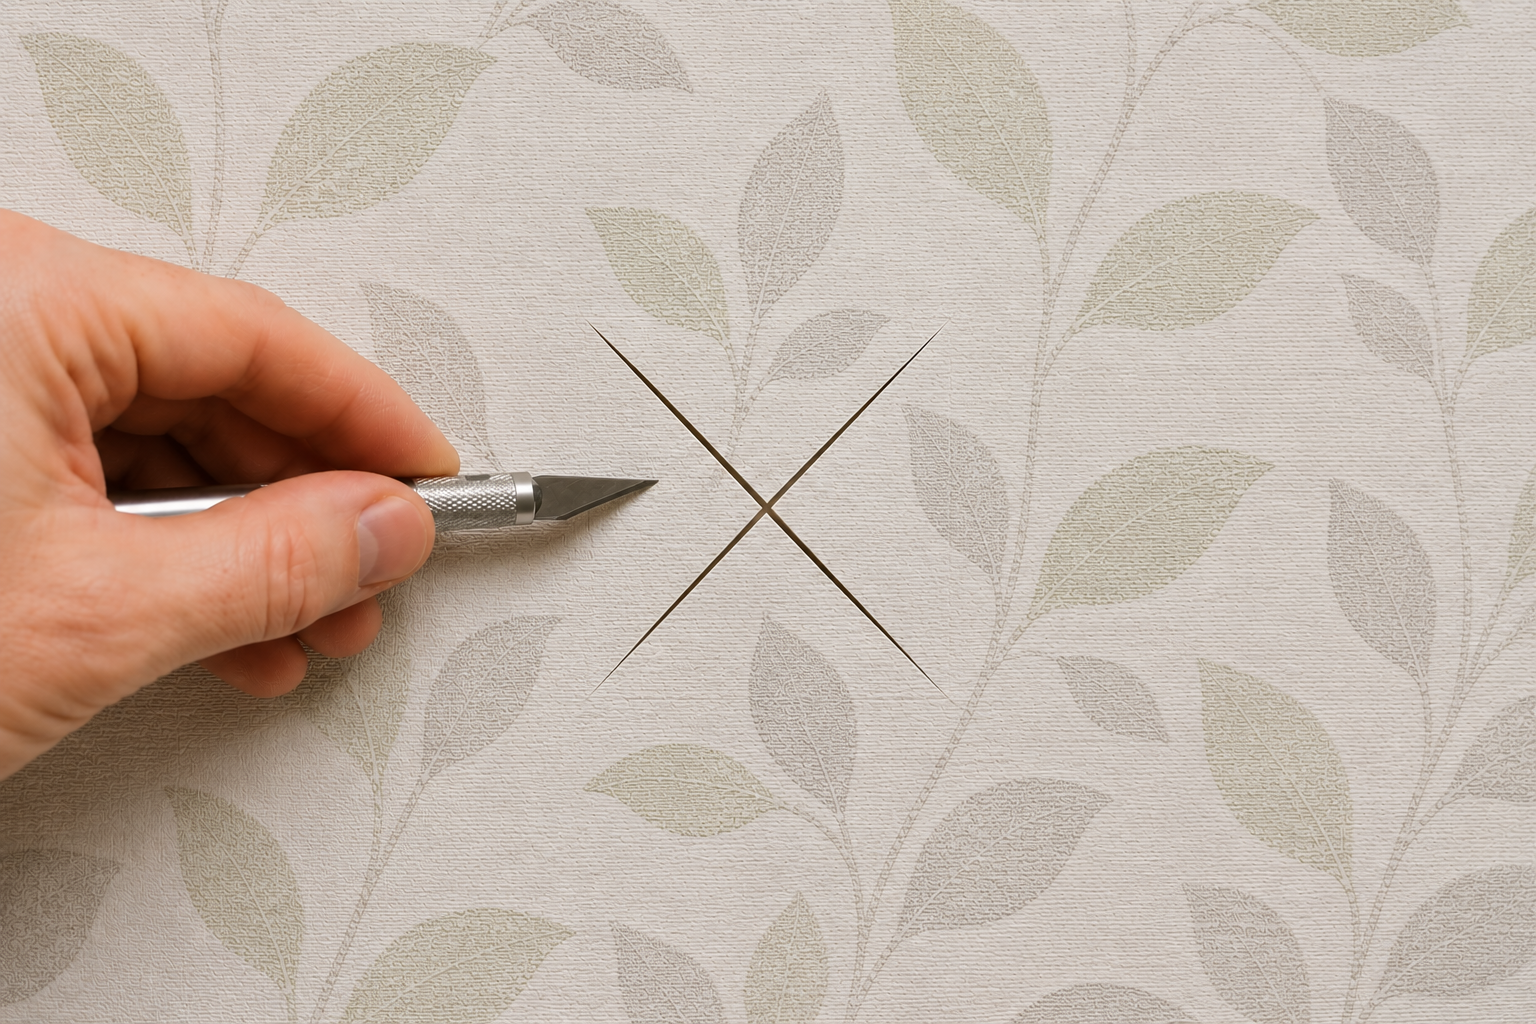
Locate the centre of the socket or switch beneath the wallpaper.
Using a sharp knife, make a small X-shaped cut from corner to corner across the opening.
Keep the cuts smaller than the faceplate. You can always trim away more wallpaper if needed, but you cannot replace material once it has been removed.
5. Trim the Excess Wallpaper
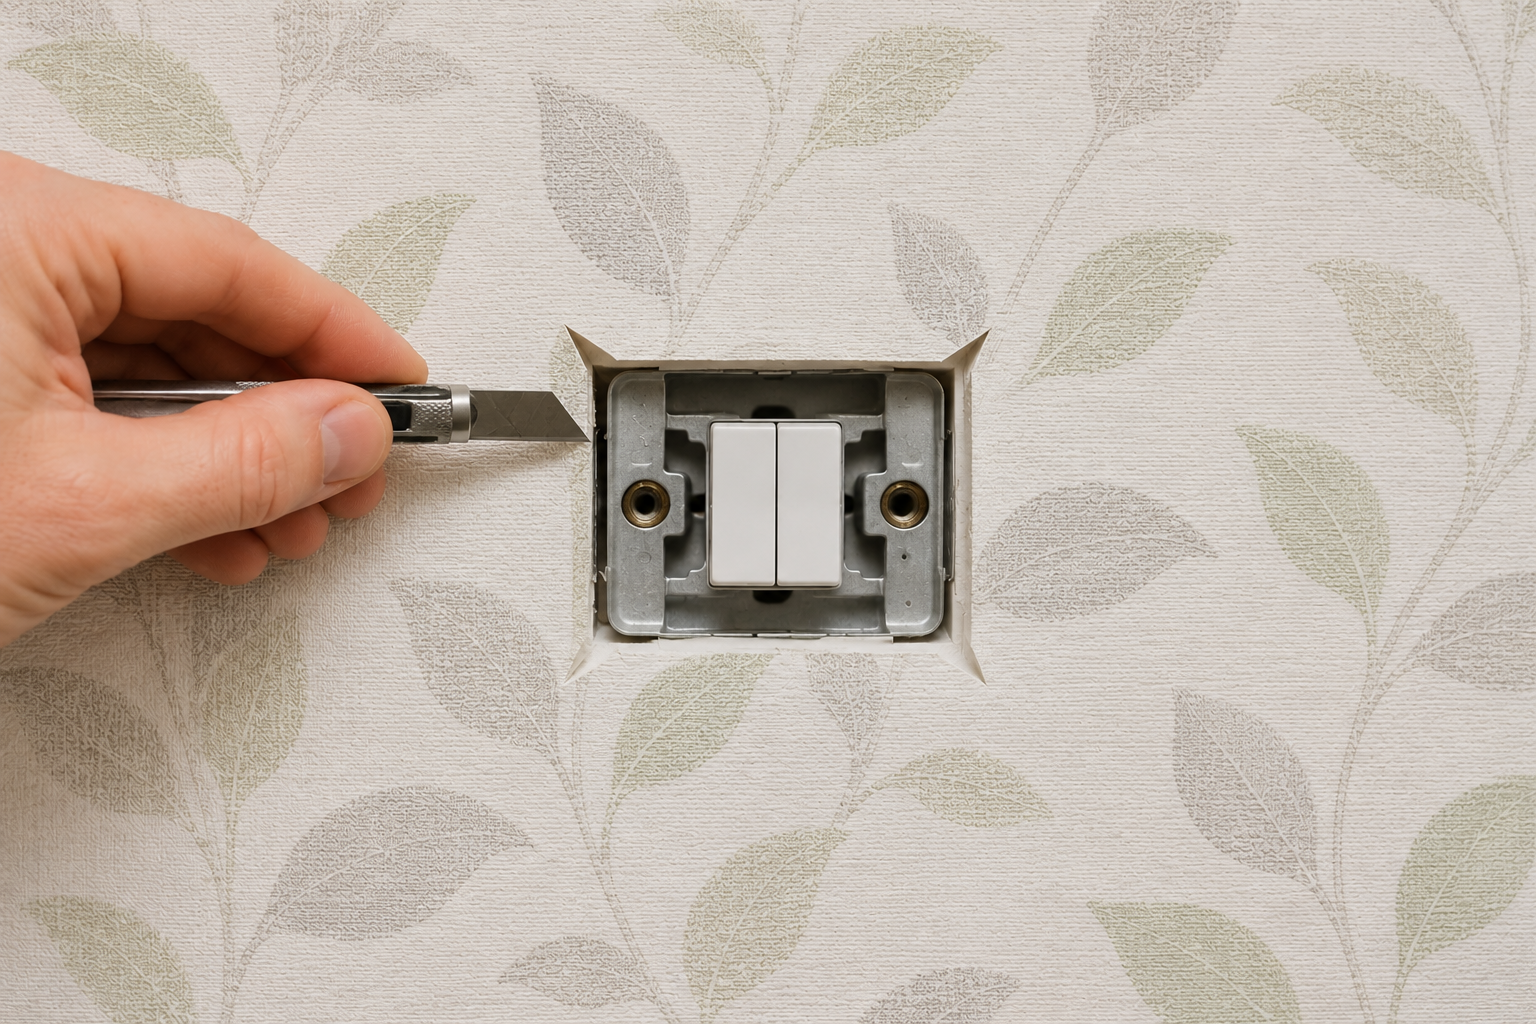
Fold the triangular flaps created by the X-shaped cut behind the loosened faceplate.
Carefully trim away any excess wallpaper so that it sits neatly behind the fitting without overlapping the electrical box.
The edges should be hidden completely once the faceplate is reattached.
6. Refit the Faceplate
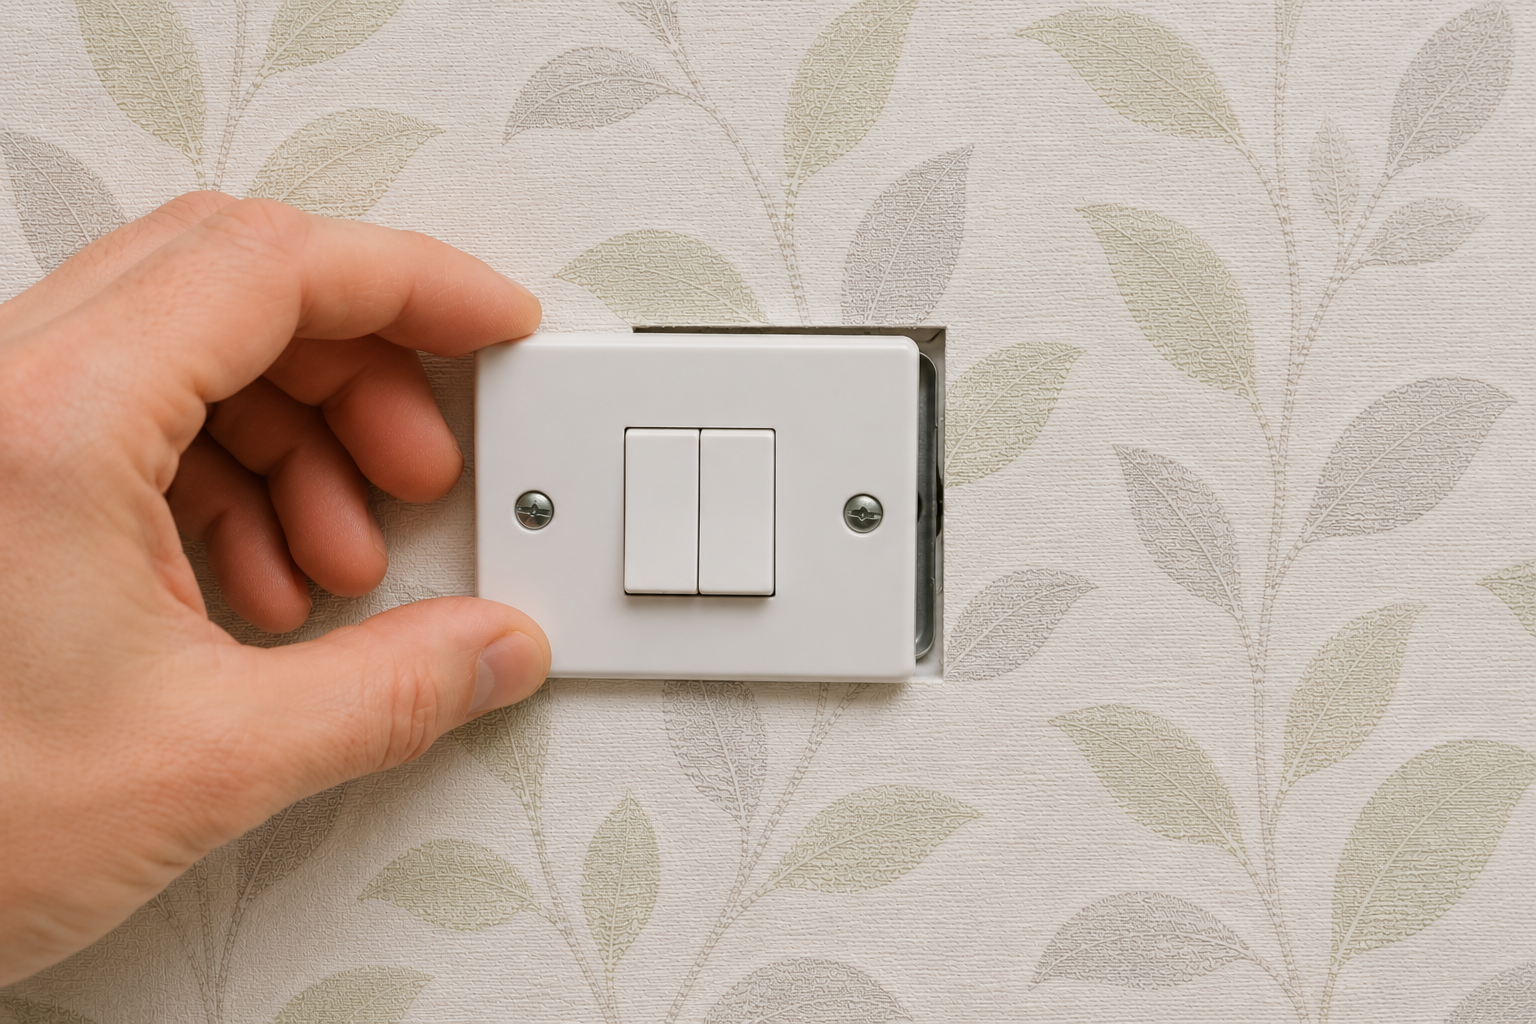
Push the socket or switch cover back into position and tighten the screws evenly.
Avoid overtightening, as this can damage the fitting or distort the wallpaper.
Check that the faceplate sits flush against the wall with no visible wallpaper edges.
7. Restore the Power
Once all faceplates have been securely refitted, switch the electrical power back on.
Test each socket or switch to ensure it operates normally.
If anything feels loose or does not function correctly, switch the power off again and inspect the fitting before use.
Practical Tips for Better Results
These simple tips can help you achieve a cleaner finish:
- Replace your knife blade regularly for smooth, accurate cuts.
- Always hang the wallpaper before making any cuts.
- Keep the X-shaped cut smaller than the faceplate.
- Wipe away excess wallpaper adhesive before it dries.
- Handle the wallpaper gently to avoid stretching around the fitting.
- Photograph the fitting before loosening it if you are concerned about reassembly.
Common Mistakes to Avoid
Avoid these common wallpapering mistakes:
- Forgetting to switch off the electrical power.
- Cutting a hole before hanging the wallpaper.
- Making the opening larger than the faceplate.
- Disconnecting electrical wiring unnecessarily.
- Using a blunt knife that tears the wallpaper.
- Trapping excess wallpaper beneath the faceplate.
- Leaving wallpaper adhesive on plastic switch covers.
Taking your time around sockets and switches will produce a much neater, more professional-looking finish.
When to Call a Professional
Wallpapering around wall sockets and switches is suitable for most homeowners, provided basic safety precautions are followed.
Consider calling a professional if:
- The electrical fittings are damaged or loose.
- You need to disconnect or replace wiring.
- The sockets are unusually shaped or recessed.
- You are installing premium or made-to-measure wallpaper that leaves little room for error.
- You are unsure how to isolate the electrical circuit safely.
If electrical work is required beyond removing the faceplate, it is best carried out by a qualified electrician.
FAQ
Do I need to switch off the power before wallpapering around sockets?
Yes. Always isolate the electrical circuit and confirm the power is off before loosening any socket or switch cover.
Should I remove the socket completely?
No. In most cases, simply loosening the faceplate provides enough space to tuck the wallpaper neatly behind it.
How do I cut wallpaper around a light switch?
Hang the wallpaper first, make a small X-shaped cut over the switch, trim the excess, then refit the faceplate.
Can wallpaper go behind socket covers?
Yes. Sliding the wallpaper behind the loosened faceplate creates a cleaner finish and hides the cut edges.
What if I accidentally cut too much wallpaper away?
If the opening extends beyond the faceplate, it may remain visible. Making small cuts and trimming gradually helps prevent mistakes.
Conclusion
Wallpapering around wall sockets and switches is easier than it may first appear. By turning off the power, loosening the faceplates and trimming the wallpaper carefully after hanging each strip, you can achieve a neat, professional-looking finish with minimal waste.
Taking the time to prepare the wall properly and work carefully around electrical fittings will help your wallpaper sit smoothly and last longer, especially when installing premium or made-to-measure wallpaper.


